Replacing a uPVC window might seem like a daunting task reserved for seasoned professionals, yet with the right tools, materials, and a clear understanding of the process, many homeowners across the UK are discovering that this is a project well within their reach. The potential savings are substantial, with labour costs for professional installation ranging from £150 to £500 per window. By taking on the work yourself or choosing an independent installer, you could save thousands of pounds on a full home project while ensuring your windows meet the latest energy efficiency standards and building regulations. This guide will walk you through the essential equipment and materials you need, as well as the key steps to achieve a secure, watertight fit that will serve you well for decades to come.
Essential Tools Required for uPVC Window Replacement
Basic hand tools and measuring equipment
Before you embark on your window replacement project, assembling a comprehensive toolkit is crucial to ensure the job runs smoothly and safely. At the heart of your collection should be a reliable tape measure, ideally one that extends to at least five metres, allowing you to accurately measure the window opening and verify the dimensions of your new uPVC frame. Precision here is non-negotiable, as even a minor discrepancy can lead to gaps, draughts, and water ingress. A spirit level is equally indispensable, helping you confirm that your window sits perfectly horizontal and vertical within the opening, which is vital for both aesthetics and proper operation of the sashes. A sharp Stanley scraper knife will prove invaluable when removing old beading, scraping away remnants of sealant, and trimming foam or excess material during installation. Complement this with a good set of screwdrivers, both flathead and Phillips, as you will encounter a variety of fixings during removal and fitting. A claw hammer is useful for gently levering out old frames and beading without causing undue damage to the surrounding brickwork or plasterwork. Additionally, a utility knife with replaceable blades ensures you can make clean, precise cuts in sealant and insulation materials. Finally, a robust pair of safety gloves and protective eyewear should be considered essential rather than optional, safeguarding you from sharp edges, splinters, and debris throughout the project.
Specialist tools for professional window installation
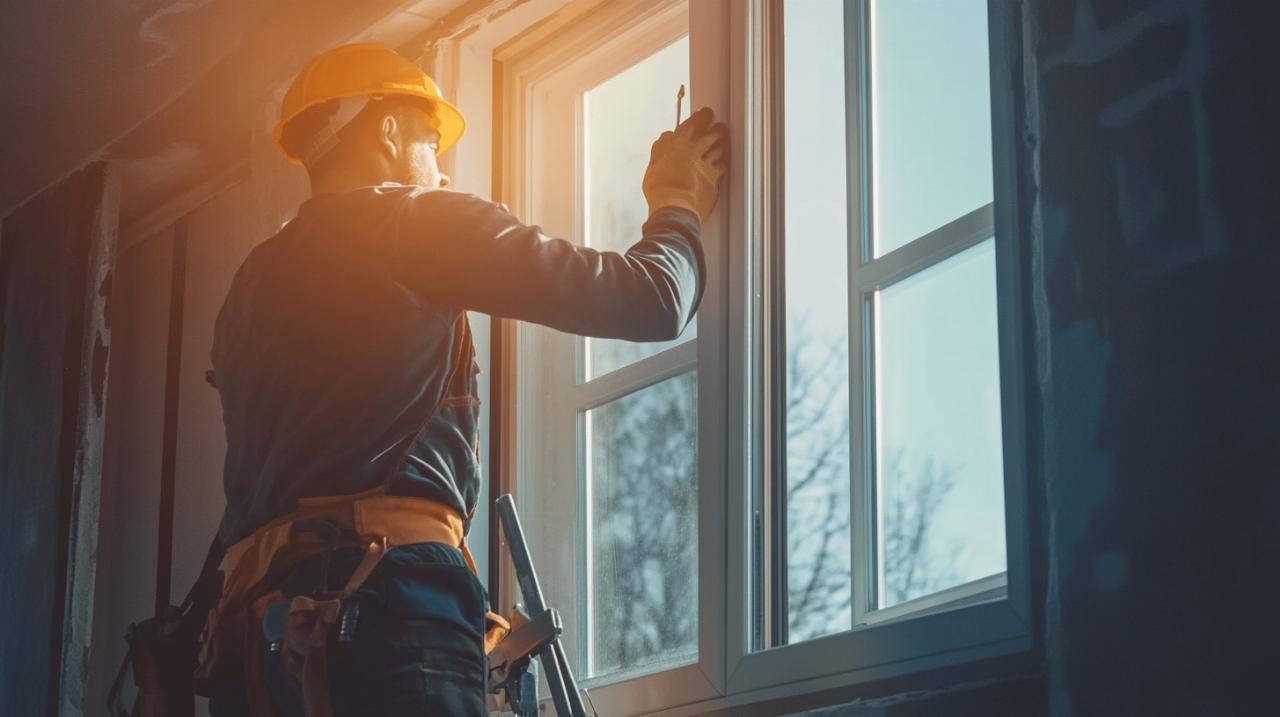
While basic hand tools form the foundation of your toolkit, certain specialist items will elevate the quality of your installation and make the process considerably more efficient. A powered drill with a selection of masonry and wood drill bits is essential for creating pilot holes for fixings, particularly when securing the frame into brickwork or timber lintels. Investing in a cordless model offers greater flexibility and ease of movement, especially when working at height or in awkward positions. A silicone gun is another critical tool, allowing you to apply sealant with precision and control along the perimeter of the frame and around the glazing units. Modern uPVC windows rely heavily on high-quality sealants to achieve a watertight and airtight seal, so a steady hand and the right applicator are key. For those tackling multiple windows or seeking a truly professional finish, a reciprocating saw or multi-tool can make light work of cutting through old fixings, beading, and stubborn frames, reducing the risk of damaging the surrounding structure. A plastic packer and shim set is indispensable for achieving the correct alignment and ensuring the frame is perfectly level and plumb before final fixing. These small adjustments can make a significant difference to the long-term performance and durability of your window. If you are working on upper floors, a stable and appropriately rated ladder or scaffold tower is non-negotiable for safe access, and you should never compromise on this aspect of the job.
Materials Checklist for Proper uPVC Window Fitting
Selecting the Right uPVC Window Frame and Glazing Units
Choosing the correct uPVC window frame and glazing unit is perhaps the most critical decision you will make during the entire replacement process. In the UK, building regulations stipulate a minimum Window Energy Rating of 'B' or a U-value of no more than 1.4 watts per square metre Kelvin, though many modern windows now achieve an 'A' rating or better, offering superior insulation and the potential to reduce your heating bills by up to ten per cent each year. When selecting your window, pay close attention to the glazing specification, as double or even triple glazing with low-emissivity coatings and argon gas fills can dramatically enhance thermal performance. The frame itself should be robust, with multi-chambered profiles that provide additional insulation and structural integrity. Basic small uPVC windows can be sourced for around £150, while larger or premium options with enhanced features such as advanced locking mechanisms, decorative finishes, or bespoke sizing can exceed £800. It is also essential to ensure your chosen window complies with ventilation requirements, particularly in habitable rooms where building regulations mandate a trickle vent area of at least 8,000 square millimetres. For rooms designated as fire escape routes, the window must have an opening of at least 0.33 square metres, with a minimum height and width of 450 millimetres, and be positioned no more than 1,100 millimetres above the floor level. Safety glass is required in any glazing within 800 millimetres of the floor or in doors up to 1,500 millimetres from the floor, adding another layer of protection for your household. When you purchase from reputable suppliers, you should also receive a comprehensive guarantee covering frames, glazing units, and hardware, often extending to ten years, providing peace of mind and protection for your investment.
Sealants, fixings, and weather protection products
Once you have selected your uPVC window frame, the next step is to gather the ancillary materials that will secure it in place and protect your home from the elements. High-quality silicone sealant is paramount, and you should opt for a product specifically designed for exterior use and compatible with uPVC materials. This sealant will be applied around the perimeter of the frame, between the frame and the masonry, and around the glazing units to create a watertight and airtight barrier. A neutral-cure silicone is often recommended, as it is less likely to cause discolouration or damage to sensitive surfaces. In addition to sealant, you will need a selection of fixings appropriate for your wall type, typically including stainless steel or galvanised screws with plastic plugs for masonry, or wood screws if you are securing into a timber frame. The number and spacing of fixings will depend on the size of your window and the manufacturer's guidelines, but as a general rule, fixings should be placed at regular intervals around the perimeter, ensuring the frame is securely anchored. Expanding foam is another valuable material, used to fill any gaps between the window frame and the opening, providing additional insulation and helping to absorb movement. However, it should be applied sparingly and only after the frame is fully secured, as excessive foam can distort the frame and affect the operation of the window. External beading is often supplied with your window and is essential for holding the glazing units in place, while plastic packers and shims allow you to fine-tune the alignment and ensure the frame is perfectly level and square. Finally, consider investing in a damp-proof membrane or breather membrane to line the opening, particularly in older properties where moisture ingress may be a concern. This additional layer of protection can prevent condensation build-up and prolong the lifespan of your installation, which for modern uPVC windows typically ranges from twenty to thirty-five years.
Step-by-step process for removing old windows safely
Preparing the Work Area and Removing Internal Beading
 Before you begin the physical removal of your old window, thorough preparation of the work area is essential to ensure safety and minimise mess. Start by clearing the room of any furniture, curtains, or valuables that could be damaged by dust, debris, or accidental impacts. Lay down dust sheets or protective coverings over flooring and any remaining fixtures, and ensure you have adequate ventilation if you will be cutting or using solvents. Externally, check that the area below the window is clear and that you have safe access if working at height. Once the space is prepared, the first step in removal is to take out the internal beading that holds the glazing units in place. Using your Stanley scraper knife or a specialist beading tool, carefully prise the beading away from the frame, starting at the corners and working your way along each side. The beading is typically held in place by small clips or a friction fit, so a gentle, steady pressure should release it without causing damage. Once all the beading is removed, carefully lift out the glazing units, taking care to support their weight and avoid dropping or cracking the glass. Glazing units can be heavy and awkward to handle, so it is advisable to have a second person assist you at this stage. Set the units aside in a safe location where they will not be stepped on or damaged, and if you plan to dispose of them, check with your local council for glass recycling or waste collection services. With the glazing removed, you now have clear access to the frame itself and can proceed with the next stage of extraction.
Extracting the existing frame without damaging brickwork
Removing the old uPVC frame requires patience and care to avoid damaging the surrounding brickwork, plasterwork, or timber lintels, which could complicate the installation of your new window. Begin by identifying and removing all fixings that secure the frame to the opening. These may be screws, nails, or expanding bolts, and they are typically located around the perimeter of the frame, hidden beneath trim or within the frame profile itself. Use your drill or screwdriver to extract these fixings, taking care not to strip the heads or damage the surrounding material. If fixings are particularly stubborn or corroded, a reciprocating saw or angle grinder can be used to cut through them, though this should be done with caution to avoid sparks or excessive vibration that could crack the masonry. Once all fixings are removed, gently prise the frame away from the opening using a crowbar or claw hammer, working slowly and evenly around the perimeter to avoid sudden movements that could cause cracking or splitting. In many cases, the frame will also be adhered with old sealant or expanding foam, which should be cut through using your utility knife. As the frame begins to loosen, you may need to tap it gently with a hammer to break any remaining adhesive bonds, but always work carefully to preserve the integrity of the opening. Once the frame is completely free, lift it out and set it aside for disposal. With the old frame removed, take the opportunity to inspect the opening thoroughly, checking for any signs of damp, rot, or structural damage that should be addressed before the new window is installed. Clean away any loose mortar, old sealant, or debris, and if necessary, apply a primer or sealant to the masonry to create a sound surface for the new installation.
Installing your new upvc window: best practice techniques
Achieving a Watertight Seal with Proper Insulation Methods
With the opening prepared and the old window removed, you are now ready to install your new uPVC window, and achieving a watertight seal is the most critical aspect of this stage. Begin by applying a continuous bead of silicone sealant around the perimeter of the opening, ensuring complete coverage on all sides. This sealant will form the primary barrier against water ingress and should be applied generously but neatly, as excess can be trimmed away later. Next, carefully position the new window frame into the opening, using plastic packers and shims to support it and ensure it is level, plumb, and square. Take your time with this step, checking your measurements repeatedly with a spirit level and tape measure, as any misalignment now will affect the operation and longevity of the window. Once you are satisfied with the positioning, secure the frame temporarily with a few fixings, just enough to hold it in place while you make final adjustments. Check the frame once more for level and plumb, and adjust the packers and shims as necessary. When everything is perfect, install the remaining fixings at regular intervals around the perimeter, following the manufacturer's guidelines for spacing and positioning. After the frame is fully secured, apply expanding foam into any gaps between the frame and the masonry, taking care not to overfill, as the foam will expand considerably as it cures. Allow the foam to set according to the product instructions, then trim away any excess with a sharp knife. Finally, apply a second bead of sealant around the external perimeter of the frame, smoothing it with a silicone finishing tool or a wet finger to create a neat, professional finish. This external sealant is your last line of defence against the elements and should be applied with care and attention to detail.
Final Adjustments and Quality Checks for Long-Term Performance
With the frame securely in place and sealed, the final stage of installation involves fitting the glazing units, making any necessary adjustments, and conducting thorough quality checks to ensure your new window will perform reliably for years to come. Begin by carefully positioning the glazing units into the frame, ensuring they sit correctly within the rebates and are supported by the plastic packers. Once in place, install the internal beading by clipping or pressing it firmly into the frame, securing the glazing units and completing the weatherproof seal. Check that the beading is seated evenly and securely around the entire perimeter, as any gaps or loose sections could allow draughts or moisture to enter. Next, test the operation of the window by opening and closing it several times, checking that the sashes move smoothly and that the locking mechanisms engage correctly. If you notice any stiffness or misalignment, adjust the hinges or locking points using the adjustment screws provided, which are typically accessed via small covers on the frame. Properly adjusted windows should open and close effortlessly and lock securely without excessive force. Once you are satisfied with the operation, clean away any excess sealant, foam, or fingerprints from the glass and frame, using a suitable cleaner and a soft cloth. Finally, inspect the installation from both inside and outside, looking for any gaps, uneven sealant, or signs of misalignment. If you have installed the window yourself and it affects a habitable room or alters the building's structure or energy performance, you may need to notify building control, which typically costs around £100 depending on your local council. This notification ensures your work complies with UK building regulations and provides official documentation for future reference. With these final checks complete, your new uPVC window is now ready to provide enhanced security, energy efficiency, and comfort for decades, with modern windows typically lasting between twenty and thirty-five years when properly maintained.